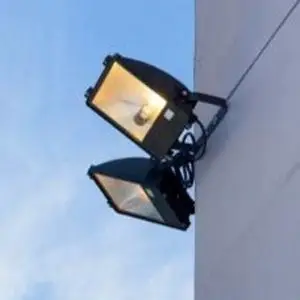
Are you in need of some extra light outside your home or at a work site? Installing a flood light can be a great way to improve security and lighting at the same time. But before you start wiring, make sure you know how to do it safely!
Tools and Materials Needed
To wire a flood light, you will need the following tools and materials:
- Wire cutters/strippers
- Flood light
- Lamp holder
- PVC adhesive
- Cable ties
- PTFE tape
- Screwdriver
- Pencil
- Drill with a 6mm bit
Shut Off the Power
Before doing any electrical work, it is crucial that you shut off the power to avoid injuries. To do this, locate the main breaker box and flip the switch that corresponds to the circuit you’ll be working on. If you cannot find the switch, flip the main breaker to shut off power to the entire house.
Remove the Old Light Fixture
Assuming you are replacing an old light fixture, the first step is to remove it. Usually, there will be two screws or bolts holding the fixture in place. Once you have removed these, the fixture should come away easily. If it doesn’t, check for any other screws or nails holding it in place.
With the old fixture out of the way, you should now see the wires coming into the box. There will be black (hot), white (neutral), and green (ground). If there is more than one set of wires coming into the box, make sure to identify which set is for this particular fixture.
Install the Flood Light Fixture
Flood lights are a great way to add extra lighting to your home or business. They can be used to light up a dark area or to provide extra security. However, before you install a flood light, it is important to wire it safely.
If you are replacing an existing light, you will need to turn off the power to the circuit at the breaker box. Once the power is off, remove the old light fixture.
Mount the Fixture
Depending on the model, mounting the fixture may be done with brackets or by attaching it directly to the house. If mounting on brick or stone, use anchors that are appropriate for the material. If attaching the fixture directly to wood, use screws that are long enough to go through the thickness of the siding and into a stud behind it.
Attach the Wires to the Fixture
Attach the green or copper ground wire to the green screw on the floodlight housing. Then take the black wire coming from the power supply and attach it to one of the brass screws on the side of the floodlight housing. The other brass screw is for the white wire coming back from the switch. Don’t worry about which brass screw you connect to, as they are interchangeable.
Turn on the Power
Assuming you have already installed the mounting bracket and wired it to the power source, the first thing you will need to do is turn on the power. To do this, locate the switch or circuit breaker that controls the power to the light fixture. Once you have located it, flip the switch to the “on” position. Test the light by depressing the test button on the flood light.
Test the Flood Light
To test the flood light, make sure the power is off to the circuit you’ll be working on. Remove the junction box cover and unscrew the wire nuts that are holding the black (hot) and white (neutral) wires together. Touch the black meter probe to one of the black wires and touch the red meter probe to the other black wire. The meter should read 120 volts. Now touch one probe to a white wire and touch the other probe to the other white wire. The meter should read 120 volts again.
In Closing
Flood lights are needed for security and accents in the landscape. They are easy to install and provide a great deal of light over a wide area. Because they are installed outdoors, they need to be weatherproof and durable. Installing a flood light is not difficult, but it is important to follow all safety instructions carefully.
NEXT UP: How Flood Light Motion Sensors Work

