There are many reasons to join pieces of metal together. Whether you’re doing it professionally or working on a DIY project, the most common way to weld is to use a welder.
But what if you don’t own a welder or don’t know how to weld? In this article we show you how to weld without a welder using several techniques that make a good joint with minimal effort.
Can You Weld Metal Without a Welder?
Yes, there are multiple methods to combine two pieces of metal without using a dedicated stick, MIG, TIG or spot welder. These methods are capable of joining metals with as much rigidity as you would expect from a regular welder.
Brazing

Brazing is the most effective alternative to welding for most metal projects.
Brazing uses a gas-powered torch and a filler material to create a metallurgical bond between two pieces of metal. The torch is used to heat the base metal and melt the filler. This is typically a propane torch for softer metals or sheet metal, or a high-heat MAPP or oxy-acetylene torch for thicker steel. The solder is then applied along the seam between the two pieces, which are held together tightly to control the solder flow.
Brazing filler material varies according to the metals you’re joining, the type of torch and the intended application. Each has its own characteristics. Brazing filler materials include:
- Copper and Zinc (brass)
- Copper and Tin (bronze)
- Copper-phosphorus
- Copper-silver
- Aluminum-silicon (AlSi)
- Silver
- Gold
- Magnesium
- Nickel
- Cobalt
Brazing has many uses. It can be used to build steel frames for cars or motorcycles, replace broken welds, replace rivets and increase strength in sheet metal assemblies. It’s a highly flexible method of joining metals.
When brazing is done properly, its strength rivals or exceeds the strength of welding. This is because it bonds tightly to the base metals and flows into all the crevices, essentially wraping more of the joint.
Solder paste or flux should be applied to clean both metal surfaces before heating them to brazing temperatures. The solder will not adhere well to oxidized or dirty metal.
Learning to braze properly can take quite awhile. Learning to use a MAPP or oxy-acetylene torch, fitting and preparing the joints, and heating the base and filler metals to the right temperature at the right pace are all required.
A high-quality torch, gas cylinders and cart can be quite costly. The costs of brazing therefore are equal to or exceed the costs of welding.
The Process of Brazing
Step 1: Different base metals require different brazing filler materials. Choose the proper filler for your specific application.
Step 2: Clean the joint area thoroughly.
Step 3: Use a brush to add a layer of flux on top of the base metals to absorb oxides formed during the brazing process.
Step 4: Open and ignite your torch. Match the heat with the filler material’s melting point.
Step 5: Preheat the base metals.
Step 6: Apply heat from one direction and add the filler from the opposite side into the joint area.
Highly Rated Brazing Torches
BLUEFIRE MRAS-8210 Super Jumbo Turbo Flame Propane Gas Welding Torch with 5′ Hose Fuel
BLUEFIRE Solid Brass Jumbo Pencil Flame Gas Welding Torch Head Nozzle Upgraded Full Metal Version
ESAB Turbotorch, 0386-0835, Brazing And Soldering Kit
Welding With a Car Battery
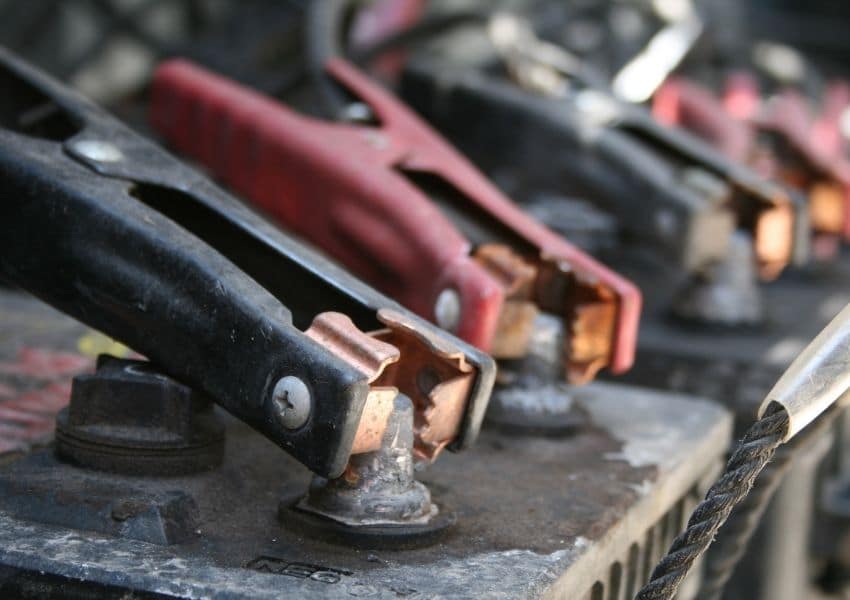
To weld with an electric arc you need a strong high-amperage power source, a ground, filler material (electrode wire or stick) and a means to control the electrical current. A car battery can be used as a temporary source of high-amperage power to weld with.
IMPORTANT! Remove the battery from the vehicle first, and only do this outside on a concrete or gravel surface with no flammable materials nearby.
A car battery (or multiple batteries connected in series) can be used to weld two pieces of steel together as follows:
- Connect a heavy cable from the negative battery terminal to your base metal using clamps (jumper cables can suffice if you don’t have anything else)
- Connect another heavy cable from the positive battery terminal. Do NOT touch the two cables together!
- On the other end of the positive cable, clamp a thin consumable electrode of some type. Ideally it should be a flux-shielded arc welding stick. The flux will vaporize and release inert gas to protect the weld from atmospheric contamination. A thick piece of mild steel wire may suffice in an emergency, but it won’t create as strong a weld due to oxidation from the atmosphere.
- Thoroughly clean both pieces of metal, as well as the end of the electrode wire or stick.
- Position your metal pieces and clamp them together so they won’t move
- Put on protective gear, including gloves, long sleeve jacket or shirt, and welding helmet or goggles.
- Touch the electrode tip to the joint between the two metal pieces, leaving it there so it melts the electrode and two base pieces together. Continue welding for no longer than 5 seconds.
- Repeat, making a series of small tack or stitch welds. Short welds are best with a car battery because it’s not designed for welding and will overheat and potentially explode if too much stress is put on it.
- Check the battery often to see if it’s overheating. If it becomes too hot to touch, stop welding and wait 10-30 minutes for it to cool down. If you see any evidence of expansion, cracking or leakage, stop immediately and disconnect your cables. Then put the battery in a sturdy plastic box and dispose of it at a recycling location.
Welding with a car battery is considered a “hack” and should be used only as a temporary measure. Car batteries do not have the controls of an arc welding machine and cannot manage the flow of energy or heat buildup properly. You can also destroy batteries this way, which is expensive and potentially dangerous.
Forge Welding

Forge welding is an ancient technique for welding two pieces of metal together using heat and impact friction. The process involves heating the metal so that it becomes malleable and then striking the materials together with force to create a bonded joint.
The resulting weld is strong, impact-resistant and flexible. It has been used extensively to forge knife blades and other tools that must withstand extreme forces.
Iron, a common alloying metal used in forge welding, melts at a relatively low temperature of around 1,535 °F (845 °C). Steel and stainless steel melt at higher temperatures of 2,750 to 2,900 °F (1,510 to 1,630 °C) — it therefore takes more heat and energy to forge weld steel.
Forge welding is ideal only if you have a very hot forge, large anvil and heavy hammers. It requires a lot of strength and endurance to strike the metals together with enough force to weld them. Most metal workers use a hydraulic machine for steel to exert the force necessary.
The downside of forge welding is it completely deforms the two pieces you’re joining. You cannot join two pieces of square tubing, two corner pieces or two layers of sheet metal with forge welding. It is only appropriate for joining two solid metal pieces that are molded together with high impact.
Soldering
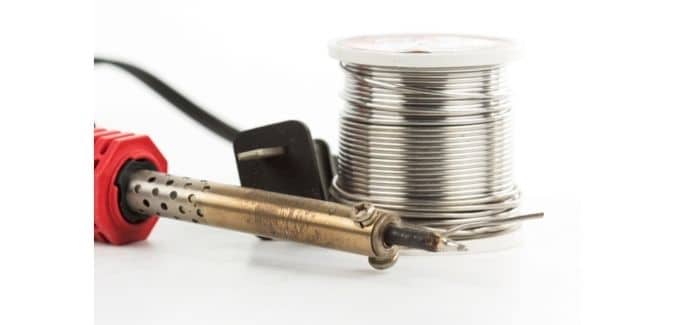
Soldering uses an electrical soldering iron, gun or propane torch and a soft filler material — usually lead or tin alloy — to bond two pieces of metal together.
Solder is metal or alloy in stick or wire form that melts at low temperature to bind other metals together. Solder is made from a mixture of filler metal and flux. The flux helps clean away any grease or dirt on the metal surfaces so solder can bond to them better.
Before solder will adhere to anything it must be heated until molten; solder will then follow the contours of the two pieces of metal you’re connecting. This acts essentially like “metal glue” with deep penetration into the surface, cracks and gaps between the two pieces.
Soldering works very well for copper, tin, brass and thin steel sheet metal. It does not work well for aluminum, stainless steel, cast iron, thick steel tubing or plate.
The biggest drawback of soldering is it’s only suitable for smaller projects with low strength requirements. Soldering does not yield the strength of welding or brazing, but it can be used for many different purposes and is somewhat easier than brazing.
The Process of Soldering
Step 1: Clean both the metal surfaces with a solder flux (ammonium chloride, resin acid, hydrochloric acid, etc.)
Step 2: Fit your two pieces together. Make sure both pieces are firmly connected.
Step 3: Add a few drops of solder flux on top of the joint.
Step 4: Use the soldering iron, soldering gun or torch to melt the filler material and carefully join the gaps between the metal pieces.
Step 5: Rotate the metal piece and follow the same steps for the opposite side if possible.
Metal Gluing
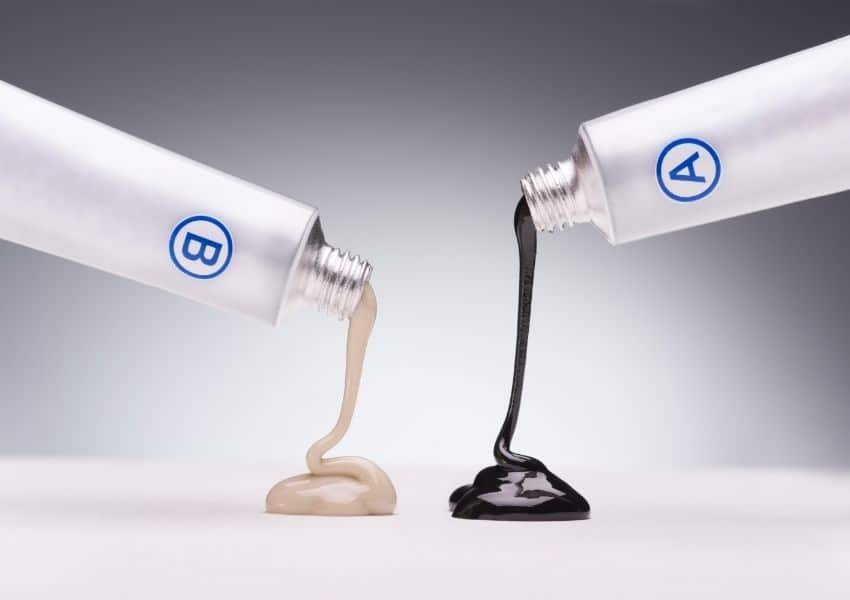
Modern glue has nearly the strength of a weld when used to bond two pieces of metal. The connection is achieved through chemically bonding metal, rather than melting it. Glued metal joints can be as strong as a brazed joint.
The benefits of gluing metals together are:
- It requires little or no prior experience
- It’s simple — there are no machines, electricity or specialized tools required
- It’s cheap
- Less metal preparation is required to fit the joint areas — glue fills in joint imperfections well
- You can often reverse the bond using another chemical agent
- There are multiple types of glue designed for different metal applications
Epoxy glue or polyurethane glue do a great job and form strong bonds with metal. Readily available glues capable of bonding metal include:
- JB Weld
- Bondic
- Permatex Epoxy
- HG Power Glue
- GorillaWeld
- Gorilla Polyurethane
- Loctite Epoxy
- Henkel structural adhesives
Mechanical Alternatives to Welding Metals Together
Riveting

Rivets are another ancient method for connecting two pieces of metal. The use of heat and rivets creates an extremely strong bond. Skyscraper and bridge girders around the world are still built and held together with rivets.
Non-ferrous materials such as aluminum, copper, stainless steel are ideal for riveting. The mechanical properties of the rivets must be the same as those of the metals being joined.
The benefits of riveting include:
- Relatively low cost
- Inherently high strength in a wide variety of applications – rivets form a powerful bond
- Pop rivets are excellent for joining thin sheet metal pieces
- Solid rivets are ideal for joining heavy iron and steel pieces when heated and pressed or hammered together
- Riveted joints suffer no thermal effects
- Riveting is an easy method to learn
The drawbacks of riveting include:
- The need to drill accurate holes in both pieces, which reduces the strength of the materials.
- Complexity — Everything must be lined up exactly, which often requires specialized jigs; you need special tools such as a pneumatic rivet gun, forge, tongs, etc.
- Wear and tear — rivets tend to work themselves loose with vibration, expansion and contraction of the base materials, or corrosion. This means that riveted connections will tend to break down and weaken over time, requiring eventual replacement.
- Rivets are not leak-proof
- Once the pieces are riveted together, it does not leave any room for modification
The Process of Riveting
Step 1: Firmly hold the metal objects together with heavy support on one side.
Step 2: Drill a hole through both pieces
Step 3: Insert a rivet in the hole
Step 4: Use the rivet gun to straighten the rivet head, compress and cut off the tail
Bolting
Bolts are another ancient method of connecting two pieces of metal together. Bolted connections achieve their strength through friction and leverage.
As the bolt is turned it creates compression and tension — forcing the two pieces of metal together.
Bolts can be threaded into a nut to connect pieces together. Bolts can also be threaded directly into one or both of the metal pieces you’re connecting.
The downside of bolting is the need to drill holes in the pieces you’re connecting together. This requries a drill and drill bit, and additional time. It also reduces the strength of the pieces you’re connecting, since you must remove metal. This strength is not fully recovered by inserting the bolt and tensioning it.
Screwing
Similar to a bolted connection, a screw connection uses friction and leverage to secure two pieces of metal together.
Metal screws come in different configurations.
- Precision screws are generally of the “machine screw” type, which resembles a bolt with a straight threaded shaft and a flat, philips or star-shaped head.
- Self-tapping screws are used for thin sheet metal, such as stoves, body panels, etc. These screws form their own threads by deforming the thin metal as they turn.
Screwed joints typically have less strength than bolts or rivets, but they are easier to make.
Wiring
In some situations, it’s better to wire together two pieces of metal, rather than welding them. For example, when laying rebar for concrete slabs and walls, the criss-cross joints are usually wired together. This allows the joint to be flexible, yet still maintain its position until the concrete hardens around it.
A spool of steel wire and a pair of safety wire twisters is what you need when wiring together two pieces of metal. The safety wire tool will make a consistent tight twist that does not deform or kink the wire.
Wiring metal together is cheap, is good for temporary joints and maintains flexibility in the structure. However, it generally makes a weak connection and should not be used alone for structural purposes.
Clamping
Specialized clamps — tubing, square, flat, C or other types — are often used to connect metal together strongly in a predefined layout.
An example is large structural permanent pipe clamps used in commercial building plumbing systems.
Clamps have the benefit of being removable. They also position your two metal pieces very precisely. The downside is they are more complex and expensive than welding.
In a Nutshell
The methods mentioned above are proven ways to weld without a welder. In most circumstances, conventional welding is undoubtedly the best option, and a professional welder is the best person to do the job. Apart from brazing and forge welding, all the methods here are relatively easy and low-cost.