Welders draw large amounts of electricity and require high-capacity connectors to pass the electrical current needed for welding.
As electrical safety studies say, proper wiring is a must for electrical equipment. When the quality of wiring is a matter of life or death — as it is with a welder — you need to be very precise and use the right connectors for the job.
In this guide we show you how to properly wire a 50-amp plug for a welder without melting the machine or electrocuting yourself. This includes:
- What tools you’ll need to wire a 50-amp plug for a welder
- What size wire you need for different welder sizes
- What size circuit breaker you need for different welder sizes
- How to wire a 50-amp plug for your welder
As an Amazon Associate, SelectSafety earns commissions from qualifying purchases made through links in this post.
What Equipment Do You Need to Wire a 50-Amp Plug for a Welder?
Here’s a list of tools and equipment you will need to wire a 50-amp plug for a welder:
(Click the links to see some good options on Amazon)
- The correct AVG gauge and length of wire to power your welder
- The correct 2-pole 50 amp circuit breaker or 3-pole 50 amp circuit breaker (to mount in your breaker box)
- Flush mount interior gang box OR exterior weatherproof gang box for the plug
- NEMA 6-50P plug (standalone outlet) or NEMA 10-50P plug (for sharing outlet with washer-dryer)
- NEMA 6-50R receptacle (standalone outlet) or NEMA 10-50R receptacle (for sharing outlet with washer-dryer)
- Voltage tester
- Adhesive electrical tape
- Cable ripper
- Wire stripper
- Screwdriver
- Electrician’s knife or box cutter knife
- Safety glasses
- Electrician’s work gloves
- Rubber soled shoes
What Size Power Cable Do You Need for a Welder?
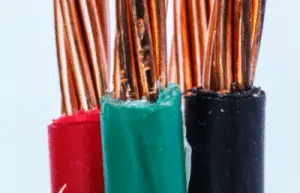
The first consideration before wiring in your 50-amp plug is to choose the right size electrical cable to power the plug. Sizing the input wiring to power a welder is done based on the specific current requirements of your welder.
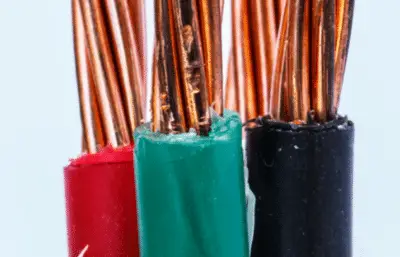
If the cable carrying electricity to the plug that powers your welder is too small, it overheat and melt the insulation. This can cause a short circuit, leading to a potential fire. It’s very bad if you don’t use big enough electrical wire to power your welder.
On the other hand, there is no negative impact from using oversize cable. The larger wiring will carry the current fine with no issues. The only downside is the additional cost of heavier copper and connectors. In fact, if you plan to run large power tools, a pump or compressor off the same plug you’re using for welding, then you should consider going to a higher gauge electrical wire. This will give you flexibility and plenty of safe current capacity for your welder.
Here’s a table of copper wire gauges required for welders with different input amperages:
| Maximum Welder Amperage Draw | Wire Gauge (AWG) |
| 30 | 10 |
| 40 | 8 |
| 50 | 6 |
| 60 | 4 |
For most 220-volt welders 6-gauge wiring to the power plug will be sufficient. For a small 110-volt hobby welder you’re usually fine with 10 gauge wire.
Table 310-16 of the National Electric Code specifies the wire sizes required for specific current draws. If the table above doesn’t give you the answer you need, we recommend checking out the NEC specifications.
Here are some good quality 6- to 10-gauge copper wires you can use for your plug:
- 6 Gauge 15 Feet Black + 15 Feet Red Copper Flexible Cable Wire
- 8 Gauge 10 Feet Black + 10 Feet Red Copper Flexible Cable Wire
- 10 Gauge 10 ft Black + 10 ft Red Silicone Copper Wire
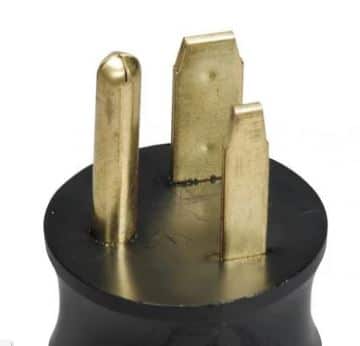
Use a NEMA 3-Prong Plug
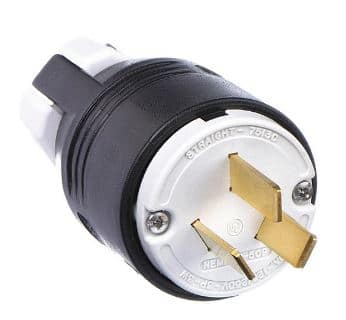
220-volt welders require a NEMA 3-prong 50 amp plug in the United States. Two of the prongs carry 110 volts each for a total of 240 volts. The third prong is a neutral or ground line.
You need a NEMA 6-50 plug and receptacle for a standalone outlet you don’t plan to share with your washer-dryer. Here’s what you need (links to Amazon):
- NEMA 6-50R receptacle (standalone)
- NEMA 6-50P plug (standalone)
To share the outlet with a washer-dryer you need a NEMA 10-50 plug and receptacle combined with a NEMA 6-50-P adapter. Here’s what you need (links to Amazon):
- NEMA 10-50R receptacle (shared with washer-dryer)
- NEMA 10-50P plug (shared with washer-dryer)
- NEMA 6-50-P adapter (to convert wall socket to welder plug)
It’s essential to connect these three plugs and receptacles correctly or all kinds of catastrophic things will happen when you turn the power on!
What Size Circuit Breaker Do You Need for a Welder?
The amount of input current required to power your welder determines the circuit breaker size you need.
As a general rule a 220-volt welder drawing 40-50 input amps requires a 50-amp circuit breaker. A 110-volt welder drawing 20-30 input amps requires a 30-amp circuit breaker.
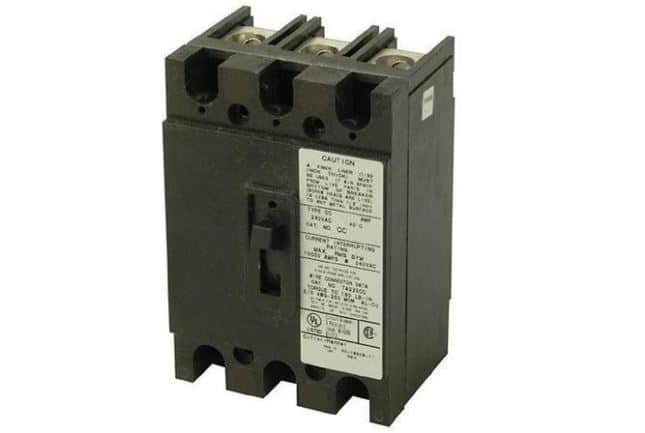
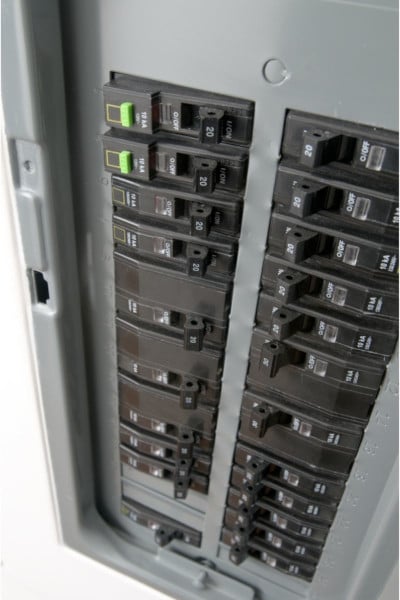
The circuit breaker is the safety mechanism that will trip and shut off the current in the event of a short or electrical overload by your welder. Circuit breakers should be mounted in a breaker box near the shop area where you’re welding.
Here are the 50 amp circuit breakers you will need depending on whether your system uses 2-pole or 3-pole (links to Amazon):
CAUTION: Selecting the right circuit breaker and wiring it into your breaker box properly should only be done by a certified electrician. This is NOT something an amateur should do because any errors can easily lead to burning down your building with an electrical fire.
How To Wire a 50-Amp Plug for a Welder
Once you’ve got your circuit breaker installed, it’s time to dive in and wire up your 50-amp plug for your welder.
NOTE: We show you how to wire in a 3-prong NEMA 6-50P which is the most common 220-volt welder plug / receptacle format in the United States. Many 220- or 240-volt household washer-dryer outlets use a 3 flat angled prong plug format (NEMA 10-30P/10-50P). If you want to use the outlet for a washer-dryer then you should wire in a NEMA 10-30P/10-50P outlet and combine it with a NEMA 6-50-P adapter to run your welder.
Step 1: SAFETY FIRST! Turn off the main power
Before you start running wire between the breaker box and your outlet, shut down the main power supply to the main breaker box. This should be a large lever. Then switch the main circuit breaker off as well, just in case.
Next, put on your safety glasses, rubber electrician’s gloves and rubber soled shoes. The human body is a good conductor of electricity and you don’t need to be a lightning rod for the day!
Finally, to be 100% sure the power is off, use your voltage tester, holding one probe against the neutral bus bar and the other probe to both screws on a circuit breaker. Do NOT touch the big black cables running into the main circuit breaker — these are always on and could give you a huge shock!
Step 2: Wire into the circuit breaker box
NOTE: This assumes you are running a 120/240-volt circuit with 2 hot wires (usually red and black) and a white neutral wire. A straight 240-volt circuit will have 2 hot wires and a bare ground wire.
Remove the breaker box panel cover to expose the circuit breakers. Pull the new circuit breaker out of its slot (or get a new one) so you can access its terminals.
Strip off the outer sheath of your 3-wire cable using your cable ripper, exposing the three inner wires for about a foot or so. Then strip the insulation of the white neutral wire and the two hot wires back about 1/2 inch.
Identify the 40- or 50-amp circuit breaker you want to wire your plug into. Run your cable into a cable clamp in the box so there is about 1 inch of outer sheathing and a foot of inner wires inside the box.
There should be existing white neutral wires screwed into the neutral bus bar. Select a new terminal in that bus bar and screw in your white neutral wire.
Next, insert the red and black hot wires into the 2 terminals on your circuit breaker. Tighten down the terminal screws.
Step 3: Install the circuit breaker and panel cover
Slide the circuit breaker into a slot in the breaker box with the hot wires along the hot bus bar. This should be obvious as other breakers with their red and black hot wires will be pointing the same direction. Snap the circuit breaker into place so it’s flush.
Organize the wires so they are away from the hot bus bar. Then put the box’s panel cover back on as it was before and reinstall any screws.
Step 4: Run cable to your outlet location
On the other side of the wall from the breaker box, start threading your 3-wire cable through the wall or electrical conduit mounted on the outside of the wall.
If you’re going through the wall you may need to drill holes in the studs and pass the cable through them. If necessary, remove any wallboard in narrow strips to give you access. Save the wallboard pieces to reinstall later.
Whichever route you take, make sure you’re following any necessary codes and regulations. Also be careful not to pinch the cable or run it directly over other metal or sharp corners where it could get damaged and short out.
Step 5: Install the 50-amp outlet for your welder
Your 50-amp NEMA 6-50P outlet receptacle should look like the one below. The plug receptacle and face plate mount on the front of the box.
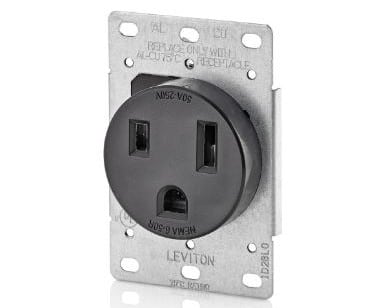
If you’re installing your outlet flush in the wall, then you will need to screw your gang box to a stud and cut out a rectangle in the wallboard for the outlet cover. If you’re using an external box then you need to mount it to the wall and run your electrical conduit into it.
Once you’ve got the box installed, run your cable into the main input / output hole. Strip off about 6-8 inches of the outer sheath off your cable. Then strip 1/2 inch of insulation off each wire.
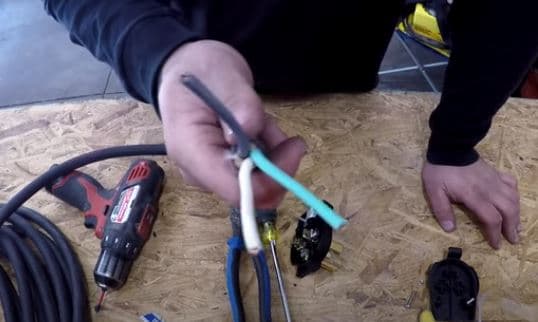
Next, wire your two hot wires into the left and right outlet terminals of the 6-50P plug as shown in the wiring diagram below. The white neutral or ground wire should be connected to the center terminal of the plug.
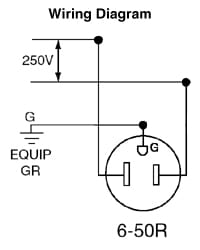
Be sure to screw all your wires down securely and make sure the wires don’t contact each other inside the receptacle box.
Step 6: Test the new 50-amp welder plug
Now it’s time to test the plug to see if it is functioning properly. Turn on the main power and circuit breaker at the breaker box. Plug your welder into plug. Then press the power button on the welder and run a test weld on a small piece of metal. If all is OK then just screw down the outlet cover and you’re good to go!
So that’s it. Now you’re all set to get working with your 220 volt welder!
Final Thoughts
Wiring in a 50-amp plug for a welder can be quite simple when you know how to connect the outlet plug and the breaker correctly. By following these steps thoroughly, anyone with some skill should be able to install a new 50-amp plug for a welder with the right tools. The key is taking the right safety precautions. If you have any doubt about your abilities definitely have a certified electrician do it for you!
NEXT UP: